
Writeup: I'm a fan

Challenge description
Agent,
Do you remember the firearms store case from last year? The one they were using as a secret communication platform?
Well, we've located the servers for them, the issue is they're based abroad in a country where we do not have any jurisdiction. Thus, we'll need to gain shell access to their systems the good old way.
They're hosting another webapp again, this time it seems like some early version of a social media network that they're working on. This is good for us as it means there will almost certainly be some vulnerabilities present.
We've linked the webapp for you, can you take a look and see if you can gain access to their server?
Statistics
- Points: 350
- Solves: 4
- Votes: 100% Positive
Solution
When you load the instance, you see there are two ports which are of interest. The primary one which is serving a web page and another which runs an SSH server. Let's start with the web page. It's a simple collection of videos with a button to upload more, effectively there is little to see here. Trying to navigate to any path redirects to a rick roll and the upload button allows us to upload videos. Trying to upload videos or different files allows us to very quickly determine that the upload size limit is 10MB, some degree of filename sanitization is taking place server-side and we can only upload files with a .webm or .mp4 extension.
What happens if we look at the resources that are being requested by the page? Not a whole lot interesting there, just a minified stylesheet and javascript for the page. The stylesheet isn't particularly interesting to us, so let's pretty-print the javascript. Anything noteworthy? No? I thought so, just plain terrible JS written by an average Olognion reader. The only interesting thing I can see here is the uploadContent function which handles the network interaction for the upload button.
async function uploadContent(e) {
    let n = new FormData();
    a = e.files[0];
    n.append("file", a);
    n.append("source", "external");
    const r = new AbortController();
    try {
    	...
        await fetch("/upload/content", { method: "POST", body: n, signal: r.signal });
      	....
}
We can see a POST request is being made to the /upload/content endpoint where a form is being submitted with two parameters, one called source and the other file. source is set to the static value of external and the other parameter is set to the file we select when using the upload form. The second param makes sense, but the first param is quite odd - why would there be a source of upload? Is this some debug parameter left behind for testing or some odd quirk?
The most obvious value that comes to mind as a potential candidate for setting source to is internal. Many tools will allow you to send a POST request in that structure, but we will use the browser console as that's all we need. Let's start by rewriting the function. If we are trying to include an internal file, then it no longer makes sense to have file set to the contents of a local file. Rather let's change this to the path of the file we want to try and include. I've added some additional error handling and interaction with the snackbar so we can get a nice-looking toast notification to display the status of each request, but this is clearly optional and inspecting the contents of the network tab inside developer tools is sufficient. Here's what our rewritten function looks like now:
async function LFI(inp){
    let fd = new FormData();
    fd.append("file", inp);
    fd.append("source", "internal");
    const ctrl = new AbortController()

    try {
      displayMDCSnackbar("Uploading Video, please wait", 10000)
       let req = await fetch('/upload/content',
        {method: "POST", body: fd, signal: ctrl.signal}).then(resp => resp.json()).then(data => displayMDCSnackbar(data.message, 4000));
       setTimeout(function(){location = ''}, 4000);
    } catch(e) {
      setTimeout(function(){location = ''}, 4000);
      displayMDCSnackbar("Upload Failed: " + e, 4000)
    }
}
Let's call our function with one of the most obvious files to test with LFI("/etc/passwd");. Depending on server load, the request will take up to 30 seconds to complete, but then we get a response from the server of Video uploaded successfully, refreshing page in 5s, this is a postive indication so let's wait for the page to refresh or do it manually. Once it's refreshed, we can see a video appears showing the contents of /etc/passwd!
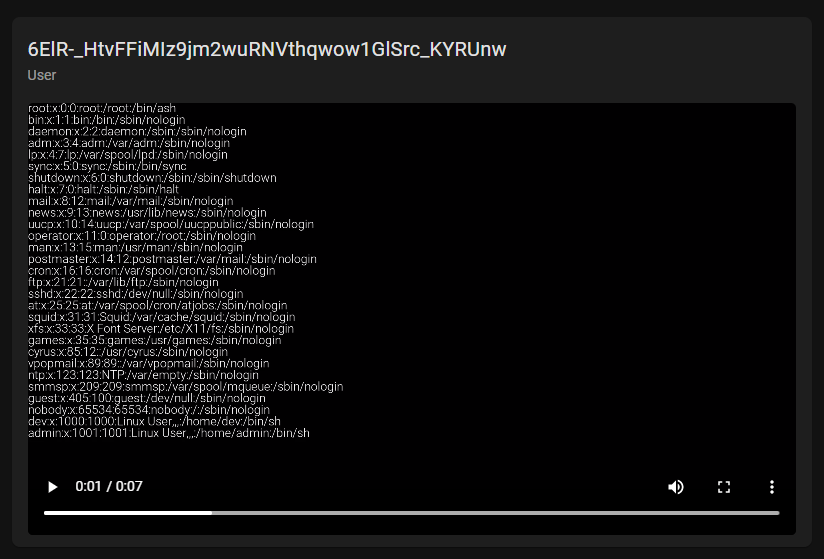
This is very good news, as now we can access almost any file on the system and have it's contents encoded to a video - it also adds weight to our earlier suspcions that this feature is used for testing purposes, after all it states in the brief that this is some early version of a social media network that they're working on. We know SSH is open on another port, so we'll try to include the SSH private keys for the user using LFI(".ssh/id_rsa").

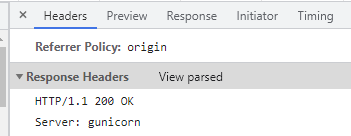
This doesn't work and searching for other types of keys (ed25519) yields nothing useful either. We also can't read the contents of /etc/shadow as the user the webserver is running on, does not have privilges to read that file. So the next step from here is to identify the webserver, by examining the response headers for our main page, we can see the server shows up as gunicorn.
Gunicorn is a WSGI HTTP server which is compatible with many web frameworks, it's commonly used to host Flask applications. This means there could be files on the system which could fit certain file naming conventions flask apps tend to use, such as app.py so let's try to include that file.
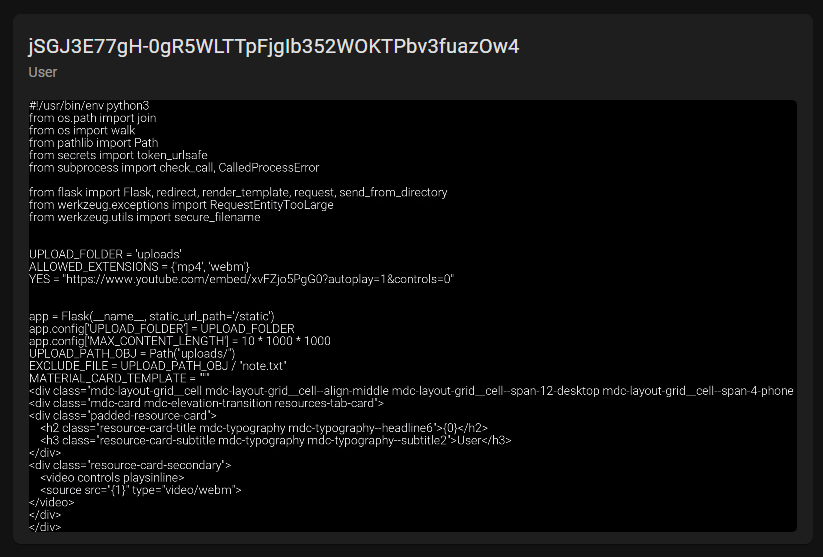
This works and by reading the code here, we can see that one particular file path is being excluded somehow where it says EXCLUDE_FILE = UPLOAD_PATH_OBJ / "note.txt". Here, UPLOAD_PATH_OBJ is clearly a Python Pathlib file object with the path of uploads/ which is having note.txt appended to it, giving us a full path of uploads/note.txt so let's try and include this file.

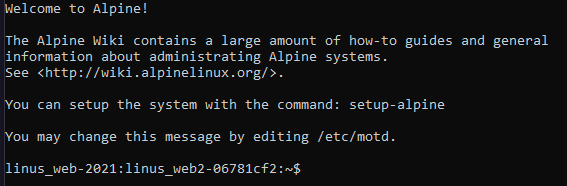
This succeeds and we can immediately see a username and two parts of a password, each hashed using Argon2. Argon2 is a key derivation function that is the winner of the Password Hashing Competition 2015, it's known for its memory intensity and comes in several variants, the one displayed here is Argon2id, a hybrid version which provides high resistance against fast parallel GPU cracking and side channel attacks. Its variable length hash function is built upon BLAKE2. Let's start by transcribing both hashes out of the displayed video and saving them somewhere. From here we can use any tool that supports this hash type and a commonly used passwords list. Thankfully, the passwords used here are very common and you should get results very quickly despite the relatively slow hash function used here. The first hash comes out to be password and the second hash is qwertyuiop. After concatenating both parts let's attempt to login as admin with the password of passwordqwertyuiop. This succeeds and we have a shell on the system!
Now, we could try to locate any SUID/SGID binaries, but Alpine generally tends to do a good job of dropping privilges when having SUID on a binary. So let's look for interesting files instead in the typical directories. One way we could do this is by searching for files recursively under / by their modification time so if anything has been modified by an user it will show up separately. Either way, quickly we can locate a file under /etc called /etc/shadow-backup.bak, by reading the contents of this file it is evident this is the shadow file for the system containing the password hashes of all users, let's try and crack the one for root as its the most interesting to us.

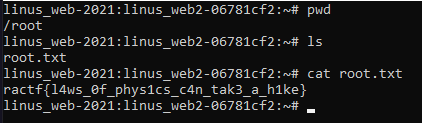
The hash here is SHA-512 so plenty of tools will be able to crack it quickly: hashcat, john, etc. Choose your favourite one and throw rockyou.txt at it or use it in brute-force mode. Either way, we recover the root password quickly which is ubisoft. Once logged in as admin, switch user to root, head to /root and view the flag.
That's all folks, thanks for reading. We hope you enjoyed the challenge!